How to Program Your Electric Bike Controller: A Complete Guide
Discover how to program your electric bike controller with this comprehensive guide. Learn the steps to customize your e-bike for peak performance.
Table of Contents
Related Articles:
Tired of the same old e-bike settings? Program your e-bike controller and unlock its full potential by customizing its power, speed, and performance.
How to program your electric bike controller? It’s easier than you think! Just follow this step-by-step process and tweak those hidden settings for a whole new biking experience!
Here is a video guide for easy resetting the controller to default settings:
Preparing to program the controller
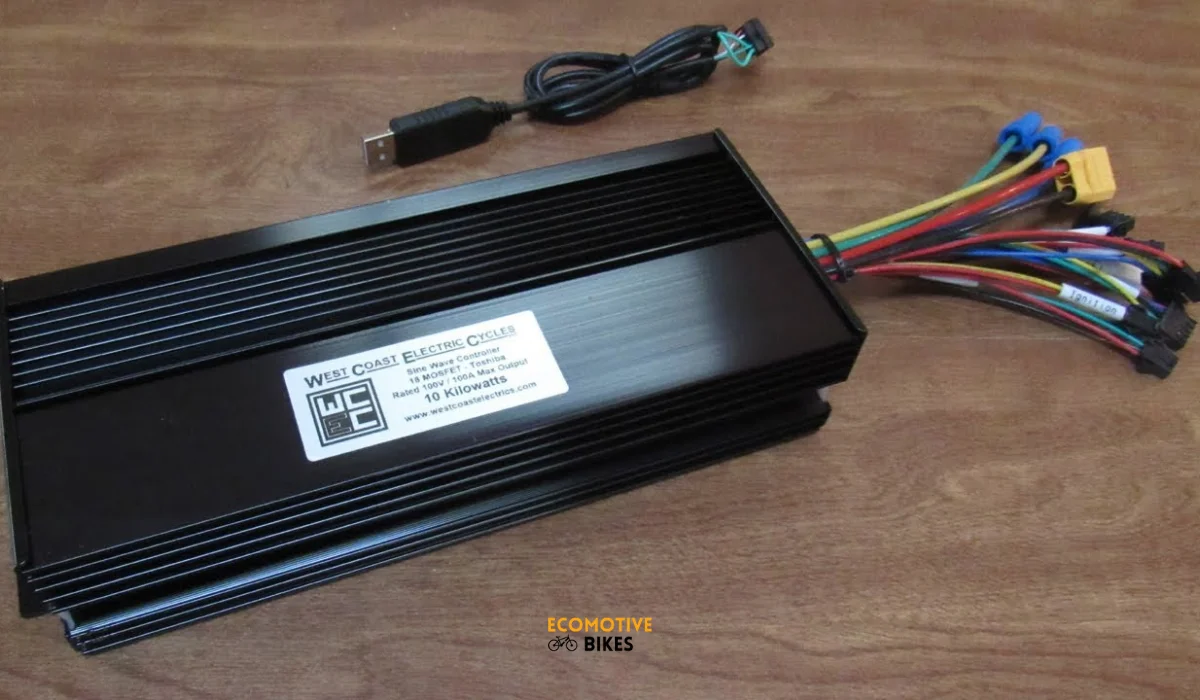
Know your e-bike controller

Before you unleash your inner e-bike tuner, there’s a key step: identifying your controller type. Just like different engines require specific tuning, e-bike controllers come in brushed and brushless varieties, each with unique programming needs. Knowing yours ensures you make the right adjustments for optimal performance – and avoids any unwanted surprises!
Gear up the tools and resources
Before diving headfirst into e-bike controller programming, gather your tools and resources. The specific needs vary upon your e-bike’s system. Some controllers might require a specialized programming tool or interface, often provided by the manufacturer. Think of it like a special key to unlock your e-bike’s hidden potential!
Plus, the manufacturer’s manual will be your golden ticket – it holds valuable information on your controller’s functions and limitations, ensuring a smooth and safe programming experience.
Related: Steps to connect an ebike controller
Programming basics
Access the controller settings
It’s time to unlock the secrets within your e-bike’s controller! Remember, any adjustments should be made with caution to avoid damaging your bike or voiding the warranty. This is where your specialized e-bike programming tool or interface comes in – often provided by the manufacturer, it acts as a bridge between you and your e-bike’s hidden settings.
Essential Precautions:
- Before initiating any reset procedures, ensure your e-bike is powered off and secured on a stable surface.
- Avoid making any unauthorized modifications to controller settings, as this could potentially damage your e-bike or void its warranty.
Step-by-Step Reset Process:
- Power activation: Begin by powering on your e-bike’s battery using the designated control panel on the controller.
- Function button engagement: Locate the designated “Function” button on your e-bike controller. Press and hold this button for approximately 3 seconds.
- Simultaneous up/down button press: While still holding the function button, locate the up and down buttons on your e-bike controller. Press and hold both buttons simultaneously for another 3 seconds. This action should initiate the process of displaying your e-bike’s default settings. You may observe a blinking section on the display, highlighting the current setting. Utilize the function button in conjunction with the up/down buttons to navigate and explore different controller parameters.
- P1 parameter selection: Employ the function button to navigate through the displayed settings until you locate the “P1” parameter. Select this parameter.
- Transitioning to the “C” parameter: Once the P1 parameter is selected, proceed to the “C” parameter settings. Hold down the function button while simultaneously pressing the up/down buttons. This should display the “C” parameter options.
- C5 option selection: Within the “C” parameter settings, locate and select the “C5” option by pressing the function button.
- C5 value adjustment: Utilize the up and down buttons on your e-bike controller to adjust the value of C5 to “1.” This modification essentially resets the selected parameter to its factory default setting.
- Saving the new setting: After setting the C5 value to 1, saving this change is crucial. Hold down the function button for 3 seconds to confirm and store the newly selected value for C5.
- Factory reset (optional): If your goal is to perform a complete factory reset of the e-bike controller, follow the same steps outlined above. However, during step 4, navigate to the “C10” parameter instead of “P1.” Subsequently, pressing the “Y” button will initiate the factory reset process, restoring the controller to its original manufacturer settings.
Essential parameters and adjustments for improved speed
These settings act as the dials on your e-bike’s performance dashboard.
Here’s a breakdown of some crucial parameters that can be tweaked for a speed boost:
- Maximum current output: This setting controls the amount of power delivered to the motor. A slight increase can translate to noticeable gains in speed. However, be cautious! Exceeding the motor’s limitations can lead to overheating and potential damage.
- Pedal Assist levels: For e-bikes with pedal assist, these settings determine the amount of motor power delivered in response to your pedaling effort. Boosting higher assist levels can provide a significant speed advantage, especially on inclines.
- Throttle response: This parameter influences how quickly the motor reacts to your throttle input. A sharper throttle response can deliver a more exhilarating ride with quicker acceleration.
Advanced programming tips
Beyond these basics, some controllers offer even more advanced settings like altering acceleration curves or regenerative braking settings for the ultimate speed enthusiasts. These might include:
- Acceleration curve: This setting allows you to fine-tune how the motor ramps up power, enabling a smoother or more aggressive acceleration experience.
- Regenerative braking: While not directly related to top speed, adjusting this setting can improve overall efficiency by capturing some energy during braking and feeding it back to the battery. This can indirectly extend your range, allowing you to potentially ride further and faster.
Tweaking these settings is all about achieving the perfect balance. While a speed boost might be tempting, prioritize safety and avoid pushing your e-bike beyond its capabilities.
Maintenance and troubleshooting
Regular check-ups and updates
E-bike enthusiasts often focus on performance upgrades, but neglecting regular maintenance can hinder your controller’s ability to deliver optimal performance. Here’s how to keep your controller running smoothly:
- Routine check-ups: Similar to any critical e-bike component, the controller thrives with regular check-ups. These preventative measures involve visually inspecting all connections for security and signs of corrosion. It’s a proactive approach to preventing potential malfunctions down the road.
- Software updates: Much like computer software, many e-bike controllers are equipped to receive firmware updates from the manufacturer. These updates offer a range of benefits, including efficiency improvements, bug fixes, and even the introduction of new features. By keeping your controller’s firmware current, you ensure you’re reaping the full rewards of your e-bike’s capabilities.
Troubleshooting common glitches:
When your e-bike sputters or lacks consistent power, it could be a programming issue. Here’s how to tackle common problems:
- Decoding erratic behavior: If your motor acts erratic or power output fluctuates, it might be a programming hiccup.
- Consulting the manual: Your manufacturer’s manual is your troubleshooting bible. Refer to it for guidance on adjusting settings or resolving specific issues.
- Systematic approach: Start by checking all connections for security. If the problem persists, consider a factory reset and reprogramming according to the manual.
- Seeking professional help: For stubborn issues, don’t hesitate to consult a certified e-bike mechanic. Their expertise can diagnose and fix complex controller problems.
Testing and fine-tuning your setting
Once you’ve made adjustments, it’s time to test! But remember, safety first:
- Harnessing technology: Utilize a speedometer or GPS app to track your speed and gauge the effectiveness of your programming tweaks.
- Safe testing environment: Choose a safe, traffic-free area away from pedestrians for your testing ground.
- Fine-tuning the ride: Based on your test results, make any necessary adjustments to refine your settings and achieve the perfect balance between power and comfort.
By following these tips, you can ensure your e-bike controller is well-maintained, operates efficiently, and delivers the optimal performance you crave!
Related: How to choose an ebike controller
Final Word: How to program your electric bike controller?
Now that you have learned the importance of programming your electric bike controller for better performance, it’s crucial to proceed with caution and follow safety measures and legal considerations. Understanding the controller, making adjustments, testing and tuning, as well as considering maintenance and upgrades are necessary steps in maximizing your e-bike’s speed.
Remember to always prioritize safety, comply with local regulations, and be aware of the potential risks associated with modifying your e-bike. If you’re unsure about making changes, seek guidance from a professional e-bike mechanic or refer to resources provided by your e-bike manufacturer. Enjoy the ride, but always prioritize safety above all else.


