How to adjust brakes on an electric bike?
Learn how to adjust brakes on an electric bike with this easy guide. Improve your e-bike’s braking performance by fine-tuning the alignment and tension.
Table of Contents
Related Articles:
Properly adjusted brakes are essential for ensuring safe and responsive stopping on your electric bike. Whether your brakes feel too loose, too tight, or are making noise, knowing how to adjust brakes on an electric bike can improve your riding experience.
In this article, we’ll guide you through the steps to fine-tune your e-bike’s brake system, helping you maintain optimal performance and safety on the road.
How to adjust brakes on an electric bike: Step-by-step guide
Here is a step-by-step guide on how to adjust brakes on an electric bike:
Essential tools for adjusting e-bike brakes
To make sure your e-bike brakes are adjusted properly, you’ll need a few essential tools:
- 5mm Allen/Hex Key: This tool is used to loosen and tighten bolts on both the brake calipers and levers.
- Torque Wrench: Ensures bolts are tightened to the correct specifications to avoid overtightening or under-tightening.
- Bike Stand: Keeps your e-bike steady while you work on it, allowing for safer and easier brake adjustments. If you don’t have a bike stand, any secure method of holding the bike upright will do.
Step-by-step guide for adjusting e-bike brakes
Now that you have your tools, follow these steps to adjust your e-bike brakes:
Step 1: Loosen the caliper bolts
Start by securing your e-bike in a stable position. Use the 5mm Allen/Hex Key to slightly loosen the bolts that hold the brake caliper in place. This allows the caliper to move just enough for alignment, without completely detaching it from the frame.
Step 2: Spin the wheel
Once the caliper bolts are loosened, spin the wheel to make sure it moves smoothly. Squeeze the brake lever to stop the wheel, then release it. Repeat this a few times so the brake pads naturally settle against the rotor. This ensures proper alignment before tightening the bolts.
Step 3: Tighten the caliper bolts
On your final check, keep the brake lever engaged while you tighten the caliper bolts. Use the 5mm Allen/Hex Key to secure them to the frame. Be sure to follow the manufacturer’s torque recommendations (usually 6-8 nm) so the bolts are secure without being over-tightened.
Step 4: Check the centering
After tightening, visually inspect the brake caliper to make sure it’s centered over the rotor. Look from the front of the bike and confirm that the rotor sits evenly between the brake pads. This step is critical for preventing uneven wear and ensuring efficient braking.
Step 5: Adjust the caliper position (if needed)
If the rotor isn’t centered between the brake pads, slightly loosen the top caliper bolt. Adjust the caliper’s position until the rotor is properly aligned, then tighten the bolt. If necessary, repeat the process for the lower bolt. Spin the wheel again to ensure it rotates freely without any rubbing.
Step 6: Test the brakes
Once adjustments are complete, test the brakes in a safe location. Check for responsiveness and listen for any rubbing sounds. If needed, make small adjustments until the brakes are perfectly aligned and functioning smoothly.
Here is a video guide that shows steps to adjust the e-bike brake:
Related: How to fix squeaking e-bike brake?
How to adjust the caliper brakes?
To adjust caliper brakes on your bike, first check the alignment of the brake pads to ensure they make even contact with the rim. Loosen the mounting bolt to realign the caliper if necessary, and then adjust the brake cable tension using the barrel adjuster or by tightening the brake cable clamp. Finally, squeeze the brake lever to test the pressure and make minor adjustments until the brakes feel firm and responsive.
Here is a step-by-step guide to adjust e-bike caliper brakes:
Step 1 – Center the brakes
Begin by ensuring that the brake pads are equally spaced from the rim. To check this, squeeze the brake lever and observe if both pads touch the rim simultaneously. If one pad contacts before the other, loosen the mounting bolt at the back of the brake caliper. Then, reposition the caliper arms until both pads make contact at the same time. Tighten the bolt once the caliper is centered.
Step 2 – Adjust break pad distance
Now, check the distance between the brake pads and the rim. This gap can be adjusted according to your preference. To change the distance, loosen the bolt holding the brake cable, and either squeeze or release the caliper arms to bring the pads closer or farther from the rim. Tighten the bolt again and test the brake lever until the pads engage at a distance that feels comfortable to you.
Step 3 – Check tire clearance
Ensure that the small lever on the brake caliper (often called the quick-release lever) is pointing downward. This lever is used for easier tire removal, but it should be secured in the correct position when riding to avoid unnecessary play or looseness in the brake.
Step 4 – Align the brake pads
Next, confirm that the brake pads are properly aligned on the rim’s braking surface. Spin the wheel to make sure the pads don’t touch the tire sidewall or sit too low, below the braking surface of the rim. Adjust the position of the pads so they are centered and aligned with the rim for effective braking.
Step 5 – Fine-tune with the barrel adjuster
Finally, use the barrel adjuster for minor tweaks to the brake cable tension. Turning the barrel adjuster clockwise increases the gap between the brake pads and the rim, while turning it counterclockwise reduces the gap. This allows for small adjustments over time as the brake cable naturally stretches.
How to adjust disc brakes on an electric bike?
Disc brakes on electric bikes offer superior stopping power and reliability, but they occasionally require adjustment to maintain optimal performance. Here’s a simple guide to help you adjust your e-bike’s disc brakes, ensuring they remain responsive and noise-free.
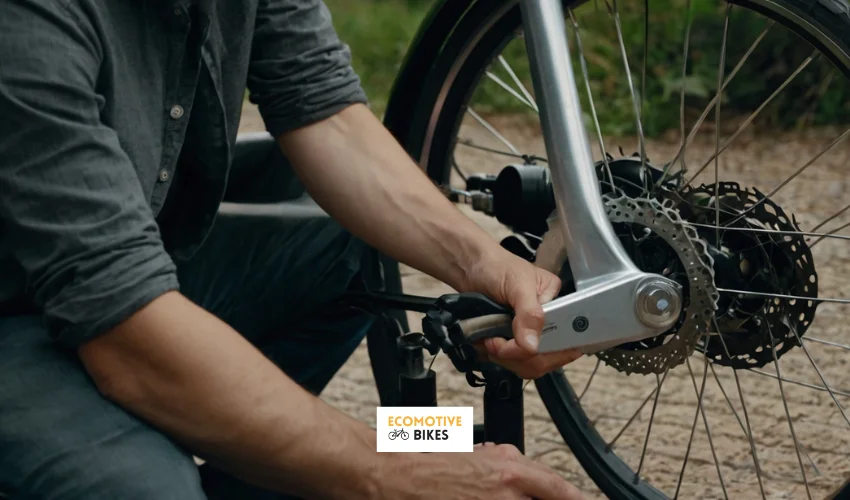
Steps to adjust disc brakes:
Step 1 – Check brake pad alignment
Begin by checking the alignment of the brake pads to the rotor. Spin the wheel and observe whether the pads make uneven contact or rub against the rotor. If there’s rubbing, proceed to realign the caliper.
Step 2 – Loosen the caliper bolts
Loosen the two bolts holding the brake caliper in place. This will allow the caliper to move freely and help you center it properly over the rotor.
Step 3 – Squeeze the brake lever
While keeping the bolts loose, squeeze the brake lever firmly. This action will center the caliper over the rotor. Once centered, keep holding the lever and move to the next step.
Step 4 – Tighten the caliper bolts
With the brake lever still squeezed, tighten the caliper bolts evenly. This will lock the caliper into position, ensuring that the pads remain centered over the rotor.
Step 5 – Adjust cable tension
If your e-bike has mechanical disc brakes, adjust the cable tension by turning the barrel adjuster. This allows for fine-tuning the brake lever’s feel. Turning the adjuster clockwise increases tension, while counterclockwise loosens it.
Step 6 – Test the brakes
Release the brake lever and spin the wheel again to ensure the rotor is spinning freely without rubbing. If necessary, repeat the steps for fine-tuning until the wheel spins freely and the brakes respond well when engaged.
These simple adjustments will keep your e-bike’s disc brakes working smoothly for safe and efficient rides.
How to adjust V brakes on an electric bike?
V brakes are commonly used on many e-bikes due to their efficiency and simplicity. Here’s a step-by-step guide to help you adjust them for smooth braking performance.
Here are the steps to adjust V brakes:
Step 1: Release the brake cable
Begin by checking if the wheel is properly centered. Hold both brake arms and release the brake cable by loosening the cable clamp. This will allow you to adjust the brake tension as needed.
Step 2: Set brake pad distance
With the brake cable released, gently release pressure on the brake arms until the pads are the correct distance from the rim. Use your other hand to guide the cable if necessary to help maintain the right gap between the pads and the rim.
Step 3: Reattach the cable
Re-secure the brake cable by tightening the clamp. Test the brake lever to ensure the brakes feel firm and responsive. If the lever feels too loose or tight, adjust the cable tension accordingly.
Step 4: Align brake pads
While holding the brake arms or squeezing the lever, ensure the brake pads are centered on the rim. The pads should make contact at the center of the rim’s braking surface, avoiding the tire or the lower edge of the rim. Once the pads are properly positioned, tighten the bolts securely.
Step 5: Fine-tune spring tension
If one brake pad is rubbing more than the other, use the small adjustment screws on the brake arms to balance the spring tension. Turn the screw on the side that’s rubbing to increase the tension, adjusting both sides until the pads are equally spaced from the rim.
This step-by-step guide ensures your V brakes are properly adjusted, giving you optimal braking performance and safety on your electric bike.
Here is a video guide to adjust V brake on a bicycle:
How to adjust hydraulic disc brakes on an e-bike?
Hydraulic disc brakes on e-bike need occasional adjustments, typically after installing new brakes, changing brake pads, or performing a brake bleed. Unlike mechanical brakes, hydraulic brakes don’t require intensive adjustments for pad balance or braking power, as that’s addressed during the brake bleeding process.
The main focus for hydraulic brake adjustment is aligning the caliper so the brake pads don’t rub against the rotor. If the pads are rubbing, you’ll hear noises like scraping, dragging, or a light “ting” sound.
Tools Required:
- 5mm Allen/Hex Key
- Torque Wrench (6-8 nm torque)
- Bike Stand or a way to securely hold your e-bike
Step-by-step process:
Step 1: Loosen the caliper bolts
Use a 5mm Allen/Hex Key to slightly loosen the two bolts that attach the brake caliper to the frame. Loosen them just enough to allow the caliper to move around, but don’t remove the bolts entirely.
Step 2: Spin the wheel and engage the brake
With the caliper loosened, spin the wheel and then squeeze the brake lever to stop the wheel. Release the brake lever and repeat this process a few times to help the brake pads settle into position.
Step 3: Final spin and tightening
On the final spin, squeeze and hold the brake lever to lock the wheel in place. While keeping the brake lever engaged, use the 5mm Allen/Hex Key to tighten the caliper bolts back to the frame. Tighten them to a torque specification of 6-8 nm.
Step 4: Check for proper centering
After tightening, the brake caliper should be self-centered on the rotor thanks to the self-centering pistons. Spin the wheel and listen for rubbing noises. If you only hear rubbing at a specific point in the rotor’s rotation, the rotor may need to be trued. Refer to the rotor truing guide for this.
If the rotor is still not centered:
- Inspect rotor alignment: Look directly at the brake caliper from the front, and check if the rotor is centered between the brake pads. You may need a flashlight to clearly see the gap.
- Adjust caliper position: Identify which side the rotor is rubbing against or closest to. Loosen just the top caliper bolt and gently push the caliper in the opposite direction of where the rotor is touching. Ensure the rotor is centered between the pads at the top section, then tighten the top bolt.
- Repeat for the lower section: If needed, repeat the same process for the lower bolt, adjusting the bottom of the caliper.
- Test and fine-tune: Spin the wheel again to check if it’s dragging on either brake pad. You may need to repeat this process a few times for perfect alignment, as it requires some patience to center the rotor correctly.
Once aligned properly, your hydraulic disc brakes should work smoothly without any rubbing.
Common issues and troubleshooting brake problems on e-bikes
Brake issues on e-bikes can stem from a variety of causes. Understanding these common problems and knowing how to address them will help you maintain a safe and smooth ride.
- Squealing brakes: Squeaky brakes are usually caused by dirt or grease on the rotor or brake pads. Clean them with a brake cleaner or a mild solvent to eliminate contaminants. Additionally, make sure the brake pads are aligned properly to make even contact with the rotor, which can help reduce the noise.
- Soft or spongy brakes: Soft or squishy brakes often indicate the presence of air bubbles in the brake lines. Bleeding the brakes will remove the trapped air, restoring firmness. Be sure to check the brake fluid levels and ensure there are no leaks in the system.
- Dragging brakes: If the brakes feel like they’re constantly rubbing or not fully releasing, it’s often due to a misaligned caliper or worn-out components. Re-aligning the brake caliper or replacing worn brake pads can help ensure smooth braking.
- Inconsistent braking performance: Uneven braking can be caused by worn brake pads or a damaged rotor. Check both for wear and tear, and replace any unevenly worn pads or damaged rotors to restore consistent braking.
Regular brake maintenance tips for your electric bike
Keeping your e-bike brakes in good condition requires routine checks and maintenance. Here are some essential tips to keep them performing at their best:
- Inspect brake pads regularly: Periodically check the thickness of the brake pads. If they’ve worn down to the wear indicators or are less than 1.5 mm thick, replace them promptly to ensure your brakes remain effective.
- Clean braking surfaces: Use a clean rag and a mild solvent to wipe down the brake pads and rotor surfaces, which helps maintain braking efficiency by removing dirt or grime.
- Check brake fluid levels: If your bike has hydraulic brakes, regularly check the brake fluid levels in the reservoir. Low fluid can affect braking performance, so be sure to top it off with the manufacturer-recommended fluid if necessary.
- Inspect brake cables and housing: Look over your brake cables and housing for signs of wear, fraying, or rust. If you find any damage, replace the affected parts to ensure smooth and responsive braking.
- Adjust brake tension: Occasionally, brake tension may need to be adjusted to ensure the brakes engage properly and with the right amount of force. Always refer to the manufacturer’s guidelines for proper tension adjustments.
Faq’s: How to adjust brakes on an electric bike
How do you adjust bike brakes sticking?
To fix sticking brakes, check for dirt or rust in the brake cable or housing, clean and lubricate it if necessary. Loosen the brake cable to reduce tension if it’s too tight. You may also need to adjust or replace worn-out brake pads or realign the brake arms.
How to adjust bike brakes rubbing one side?
If your brakes rub on one side, adjust the spring tension screws located on each brake arm. Turn the screw on the side that’s rubbing inward to reduce tension, while loosening the opposite side if needed. Keep adjusting until both pads make even contact with the rim.
How do you adjust the angle on a bike brake?
To adjust the brake pad angle, first, loosen the bolt holding the brake pad. Realign the pad so it hits the center of the rim’s braking surface without touching the tire or sitting too low. Once aligned, tighten the bolt securely to maintain the correct angle.
How do you adjust brake positions?
To reposition bike brakes, loosen the mounting bolts on the brake levers and move them up or down the handlebars for a comfortable reach. Once you’ve found a position that feels right, tighten the bolts securely. You can also adjust the lever angle for ergonomic braking.
Wrapping up: Adjusting e-bike brakes
Properly adjusting your e-bike brakes is essential for safe and smooth riding. Whether you have caliper, disc, or V brakes, regular maintenance ensures effective stopping power and enhances your overall riding experience. Following the steps to adjust your brakes helps you maintain control and safety, giving you confidence in your bike’s performance.

